Planes
I’ve been building different types of planes for the last few
years. I started out making new totes and knobs for several of my Stanley/Bailey
metal planes. Then I made new bodies for a few of my "transitional" style planes
(wooden stock bodies like planes of old but fitted with the Bailey style frog
and blade adjuster). Next came all wood specialty planes (the panel and dovetail
planes shown below). I then became interested in English style "infill" planes
(metal bodies with wood interiors). My first attempt at building a plane in this
style was finishing a rough bronze casting of a "Chariot" block plane. Being
very pleased with the results of this endeavor I began making the metal bodies
of these planes in the traditional fashion of using "double dovetails" (dovetail
joints where the tails splay in both directions) to join sheet material to form
the hull of the plane.
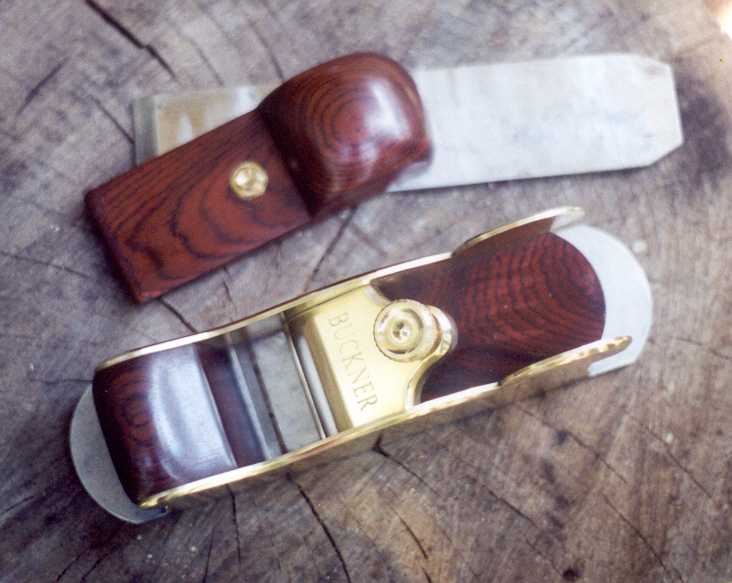
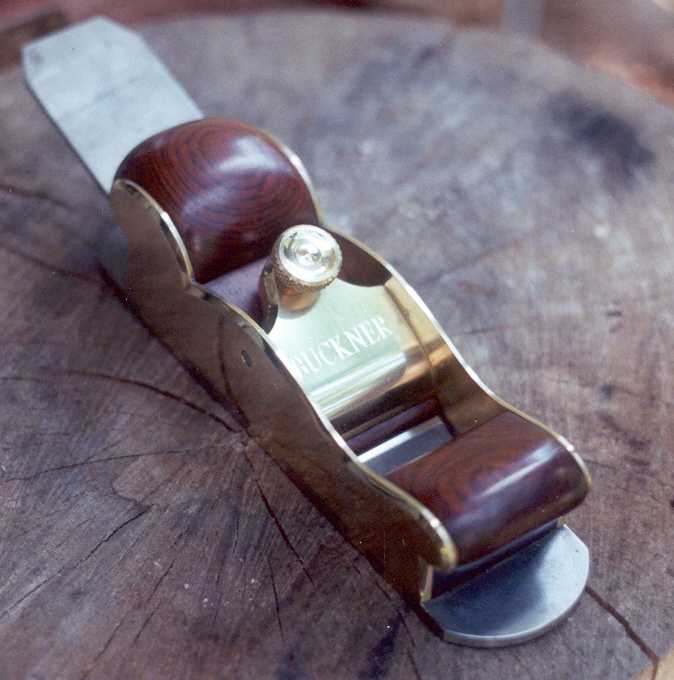
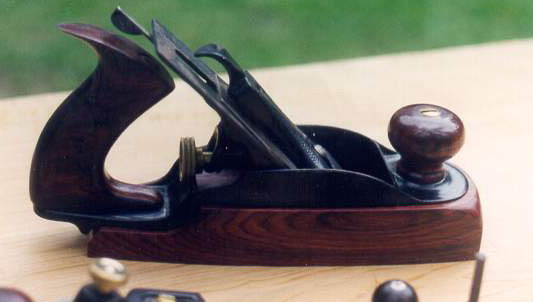
Scottish Style Mitre Plane
This is my first attempt at a traditional "dove tailed" steel
and brass plane. It took me several years of thinking about it to finally give
it a try. Turned out to much easier than I thought it would be! The design is
based on an original Scottish pattern mitre plane.
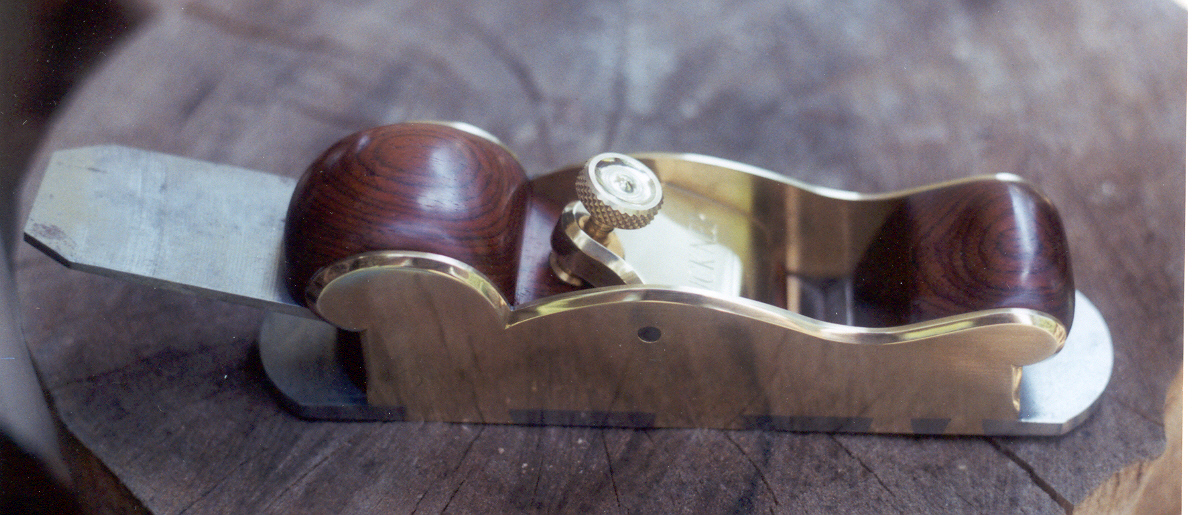
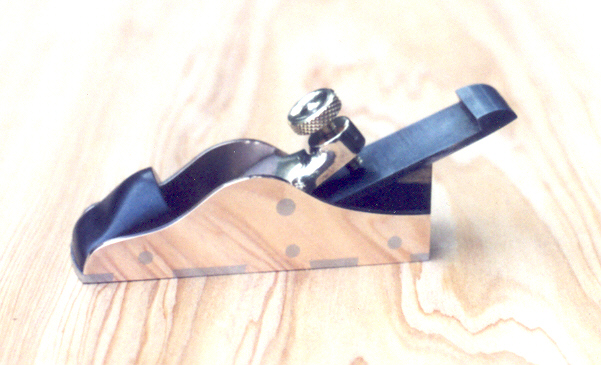
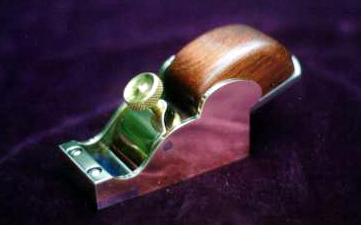
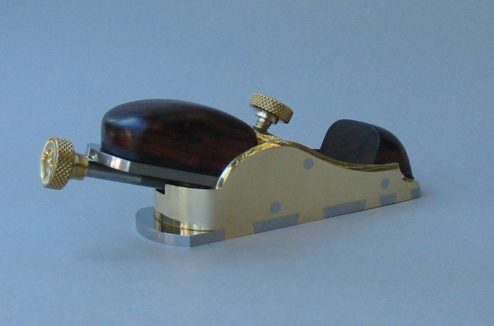
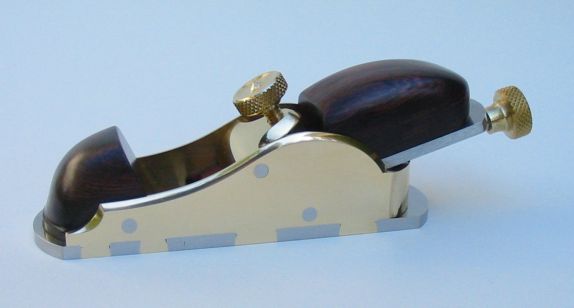
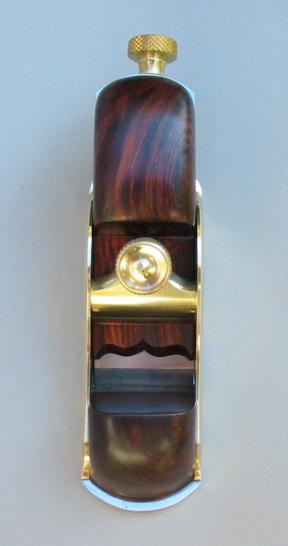
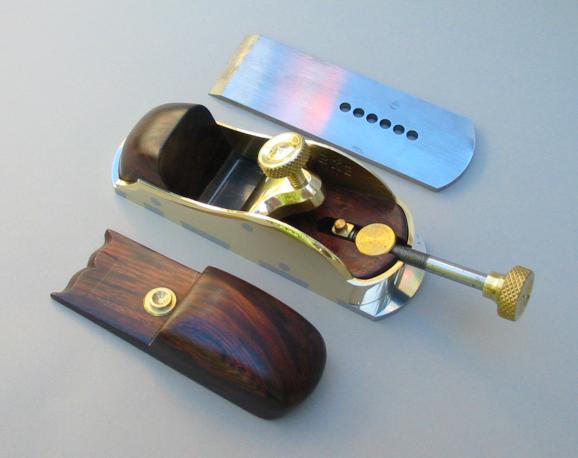
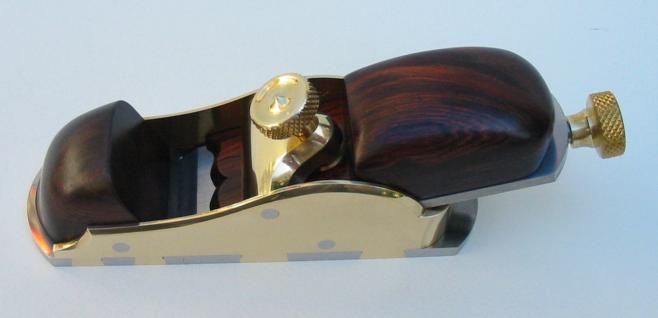
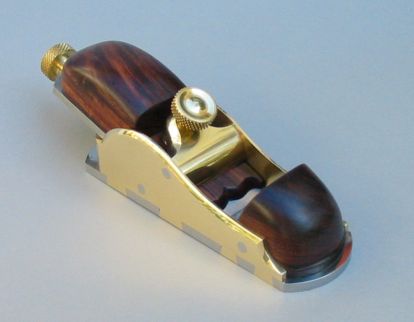
Infill Block Plane
This is my second dovetailed infill plane. It is a "block"
style plane that resembles a plane style that Bill Carter builds. Unlike his I
added the wedge over the blade for comfort (having that blasted lever cap screw
digging into your palm is not my idea of happy planing!). It's a real sweet
plane. Heavy and fits right in the palm of my hand. It's 5" long and just
under 2" wide. The tight mouth that was achieved with a split sole. The
iron is bedded at 20 degrees.
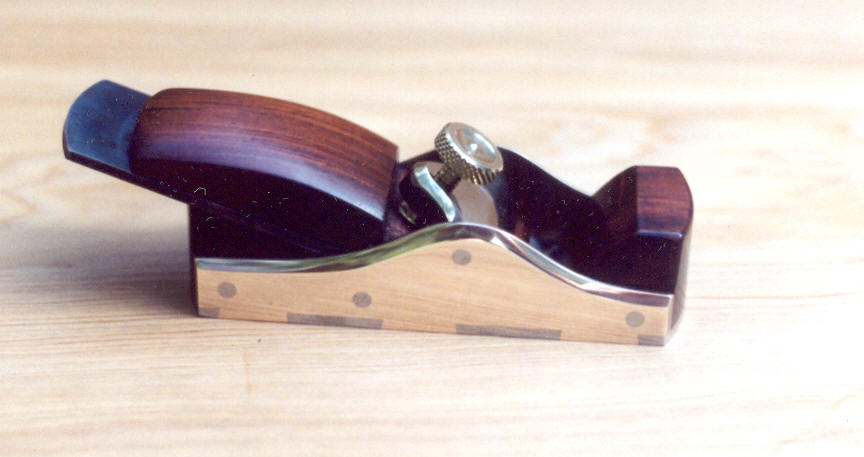
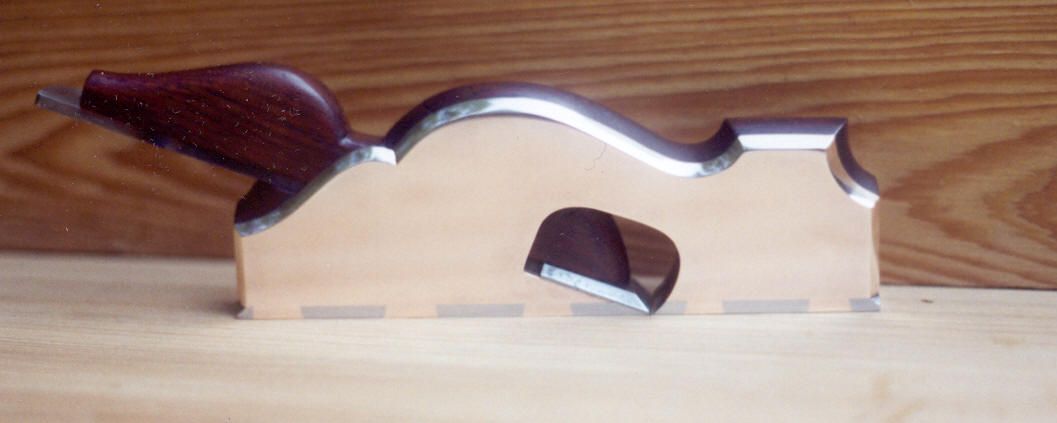
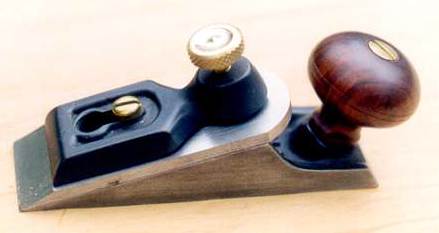
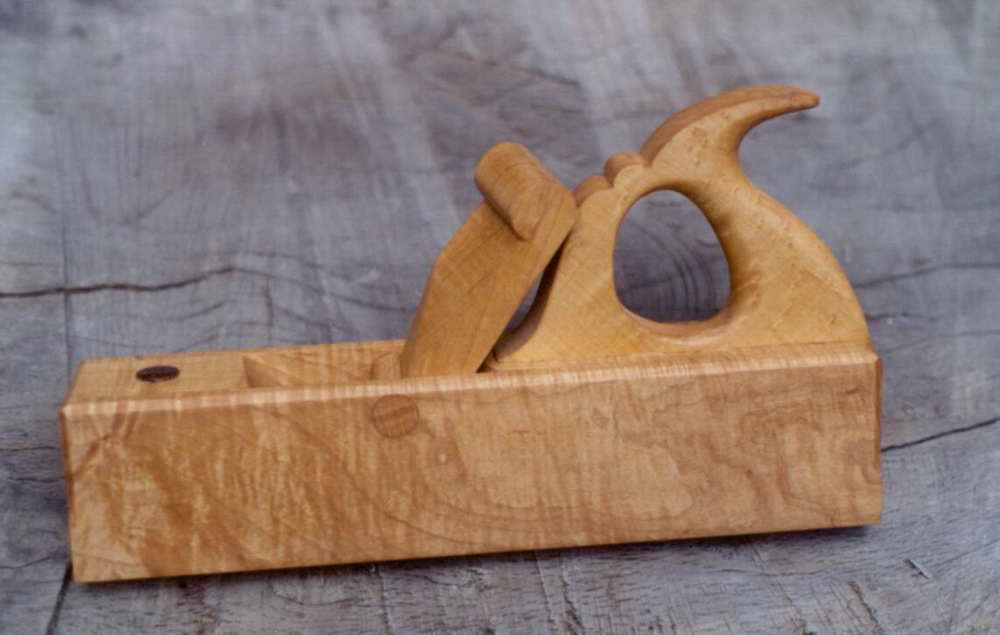
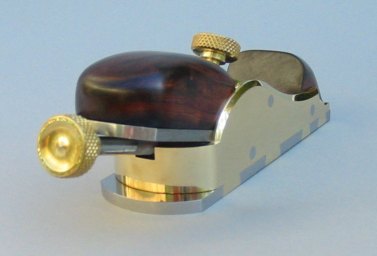
Infill "Thumb" Plane
A small block plane filled with African Blackwood (the stuff
that Clarinets are made of). If you look closely you can see just a hint of the
very light, creamy yellow sapwood at the upper rear part of the rear infill just
under the iron (I love to incorporate sapwood when working with exotics!). This
plane works quite well on nasty grain due to it’s high effective cutting angle
of 55 degrees (the infill bedding is 25 degrees and the bevel on the iron is
ground 30 degrees). The odd looking thing at the heel of the iron is called a "sneck".
This is a traditional treatment used to help make adjustments to the iron.
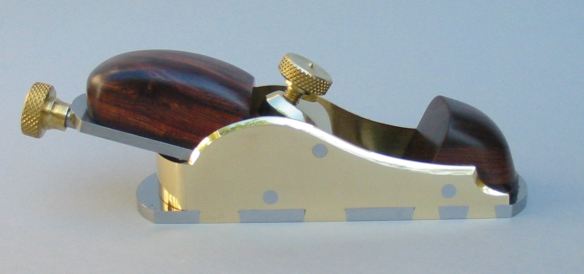
Infill Shoulder Plane #1
This plane is my first attempt at a shoulder plane. I designed it from a picture in "The
Fine Art of Tools" (p. 56 or somewhere around there, but it's in the same
picture as the little chariot plane that has the wedge carved up like a scarab
beetle). It's about 3/4 scale for a usual shoulder plane (8"). It is just shy of
6" long and is 3/4" wide, about the size of a Stanley #92. It works
fantastically in spite of a mouth size that turned out larger than I was aiming
for (I chalk this up to part of my learning curve on this plane ;^). I'm
starting to question the absolute need for an extremely tight mouth on a
shoulder plane (since it's almost always cutting end grain). In any event it
works as well or better than any shoulder plane I own or have used, so that's
encouraging for me.
It is stuffed with some very deep red cocobolo. The sole is
steel and the sides are phosphor bronze. I cut a sneck on one side of the iron
to help with the adjustments.
Infill Shoulder Plane #2 (Lancashire Pattern)
My second shoulder plane. This plane was designed based on one
shown in Garrett Hack’s "The Handplane Book". I believe this design is called a
"Lancashire Pattern". In any case I really liked the lines so decided I had to
have one. Like the first shoulder plane it’s smaller than most traditional
versions. It has a 6’ sole length and it 1" wide. I was able to improve the
mouth size this time around. It is fairly tight with a shaving aperture of
.009". It's fairly heavy and planes with "authority". I stuffed it with some
figured Kingswood. Unfortunately I’m not much with a camera and the photos are
fairly washed out so the beautiful colors in the Kingswood just didn't come out
in these pictures.
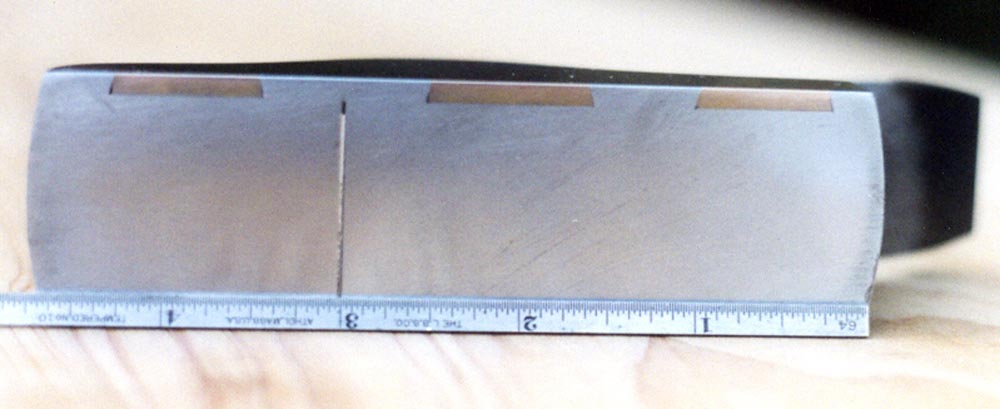
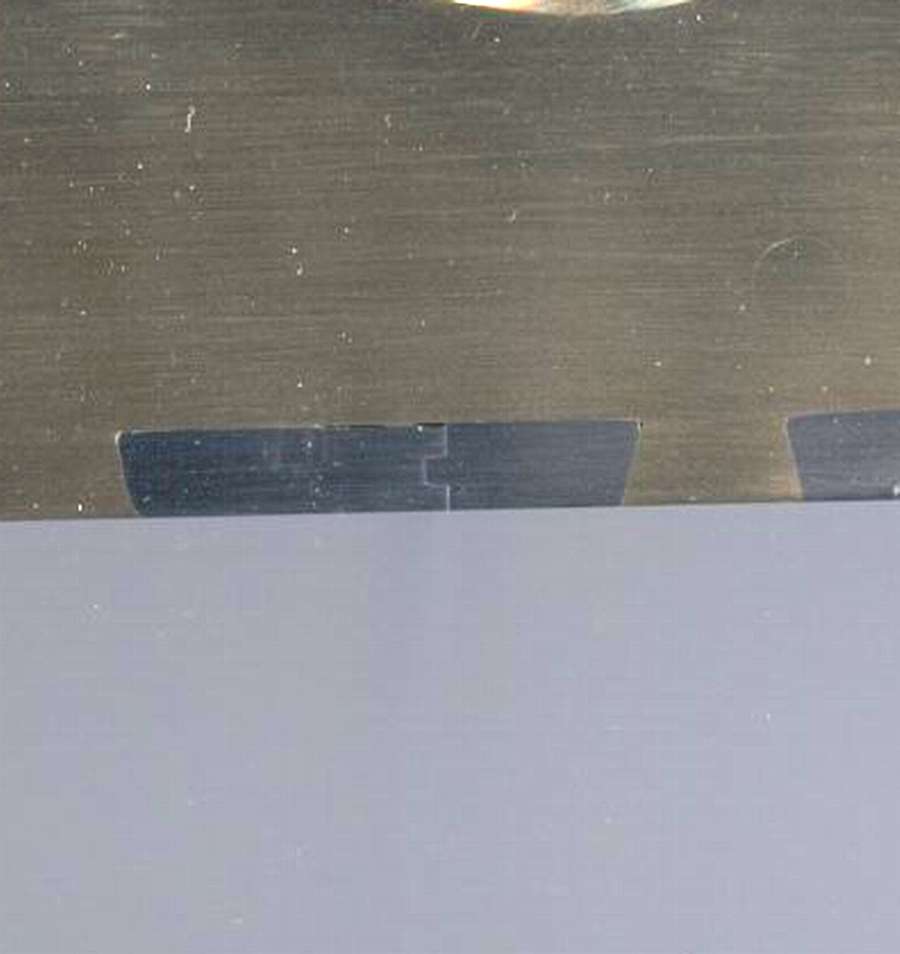
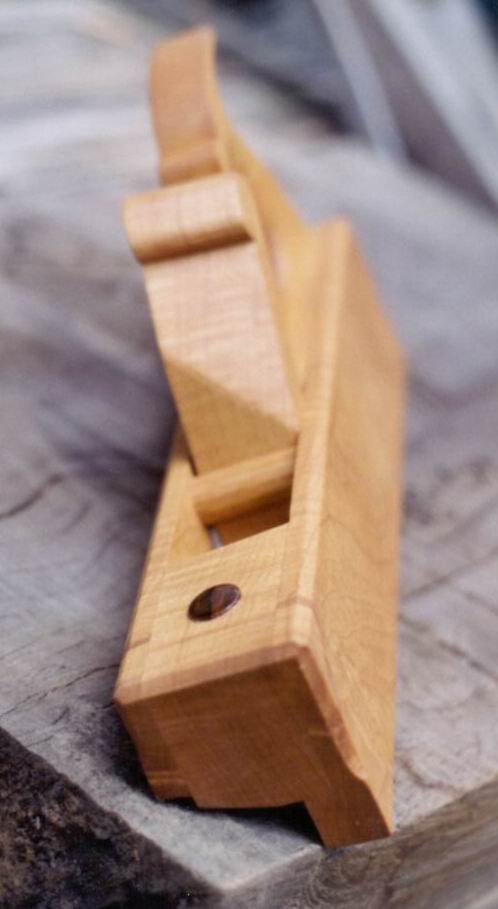
With all of this talk about tight mouth openings here is a shot
of the thumb plane from the bottom so you can see what I’m talking about. The
picture isn’t so great but the overall mouth opening here is just over 1/64"
(keep in mind that with the blade installed and adjust to just begin taking a
cut the mouth becomes much smaller). Also notice the splayed ends of the side
plate tails. These are created when the ends of the tails are peened into
openings that are filed into the sockets in the sole. This is how the "double
dovetail" is achieved. Try doing that joint in wood!
To achieve such a small mouth in a plane where the iron is mounted bevel side up
(as with mitre and block planes and opposed to the typical smoothing, panel and
jointer planes where the iron is mounted bevel down and the opening through the
sole can be much wider) the sole is "split" into two sections before and aft the
cutting edge of the iron. Since the sole sections will be joined to the sides as
part of the typical construction process, this offers the maker a chance to work
the mouth opening at a time when it is most convenient and easy to access. To
ensure that the sole goes back into alignment when the sides are added a tongue
and groove joint is filed into the sole sections at the point that forms the
mouth. You can see the joint here in my first mitre plane (the Scottish Mitre).
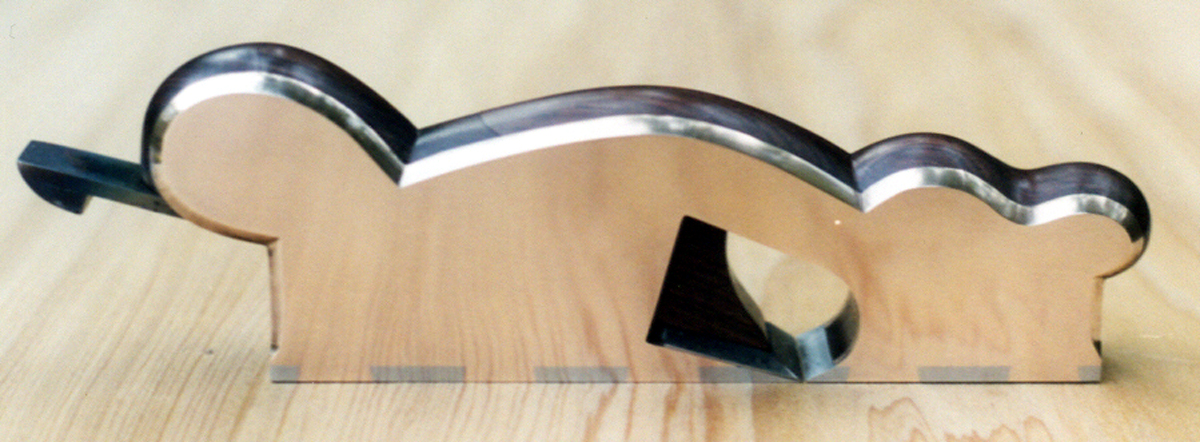
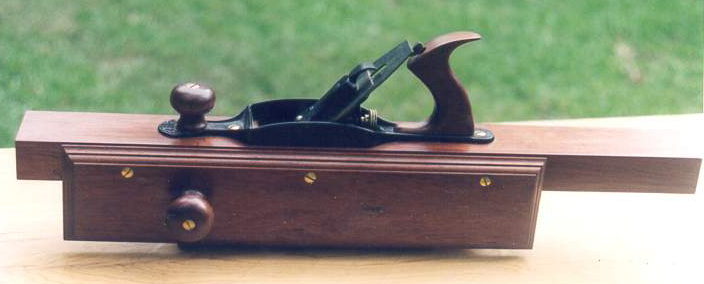
Here are both shoulder planes pictured together
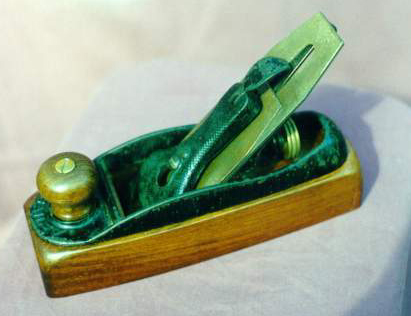
Chariot Plane
Made of Bronze (from a St. James Bay Tool Co. casting). This
was one of the first planes I made and is the tool that I reach for when nothing
else works (and I have a fairly large number of planes). It is an amazing tool!
It has an adjustable mouth unlike all of the other planes shown previously that
have fine, fixed mouths.
Small Chisel Plane
Made from an iron casting that I obtained from Rob Kempenski
who made the original pattern. This plane can also be seen at Fine Woodworking’s
Reader’s Showcase web site
Dovetail Plane
Made of Dogwood and Kingswood (this was built from fellow
Galoot Lois Michaud’s drawings).
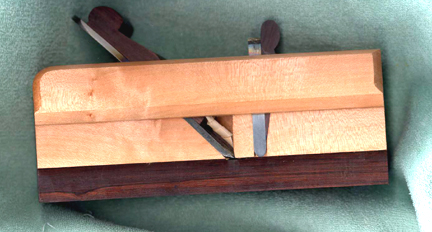
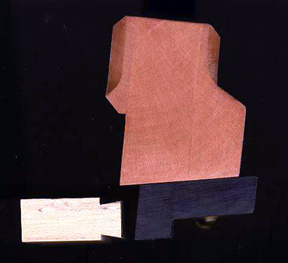
Here is a shot of the toe. This gives you a better idea of what
the plane is used for (you can see the formed dovetail piece in the lower left).
Panel Raising Plane
I took a class with fellow Galoot David Sobel where he taught
me how to build a panel-raising plane (the plane pictured in the foreground).
The class was only for one day so I had to finish it up at home. I had the plane
almost working in the class so most of the work that I did on it afterwards was
cosmetic (adding the tote and the strike buttons). I had a great time and got a
great working plane at the same time!
Stanley #36 "Transitional" Smoothing Plane
After aquiring an old Stanley #36 transitional plane with a
shot sole I decided to make something a little nicer than "OEM". The sole, knob
and tote were made of cocobola.
Transitional Jointer
Another Stanley "transitional" re-made using rosewood. This one
has a removable fence for shooting square edges.
Stanley #24 Smoothing plane
And yet another "transitional" smoother done in rosewood.
Infill
Thumb Plane
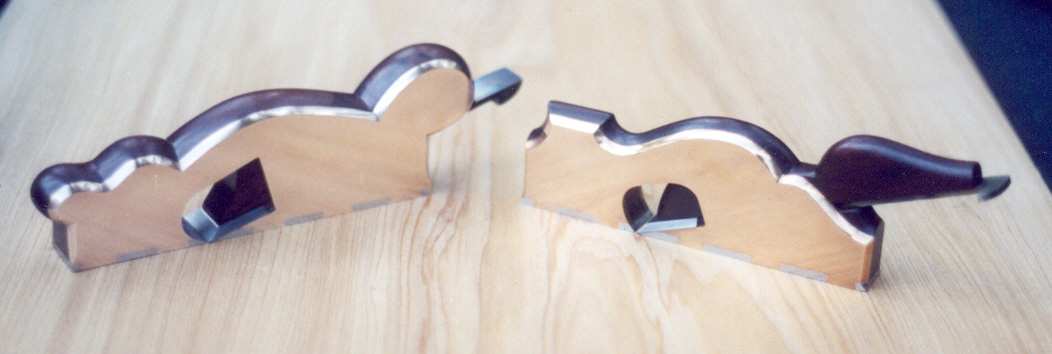
This is my first (successful) attempt at a "curved back" plane
(where the sides and back are all one piece). This design was made by most of
all the old makers (Spiers, Norris, Mathieson, etc.) with slight variations, as
shown below (Norris on right, Spiers on left).
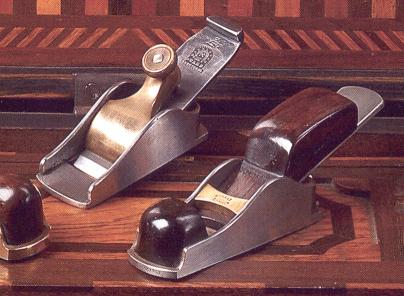
Also, it was done as a casting (usually in gunmetal) as well as
steel dovetailed construction.
 On
mine I reversed my typical order of placing the tails on the sides and pins on
the sole. This way the bent sides dropped down onto the sole at assembly. It's
not my preferred method as I believe that more of the stress on the plane is
exerted by the lever cap pressing down on the iron. It literally is trying to
force the sole off of the sides. That's why I like to have the tails on the
sides. But, I'm sure either way is plenty strong (plus the tails side is always
the nicest looking and thus should be on the sides in plain view).
On
mine I reversed my typical order of placing the tails on the sides and pins on
the sole. This way the bent sides dropped down onto the sole at assembly. It's
not my preferred method as I believe that more of the stress on the plane is
exerted by the lever cap pressing down on the iron. It literally is trying to
force the sole off of the sides. That's why I like to have the tails on the
sides. But, I'm sure either way is plenty strong (plus the tails side is always
the nicest looking and thus should be on the sides in plain view).
The thumb plane measures 1 11/16" wide, 5 1/2" long (sole
length of which the rear "lip" extends 5/16" out from the rear of the plane
body). The iron is 1 1/2" wide. The adjuster is 40 tpi making it very sensitive
(same as a micrometer thread). The body is made of navel brass and the sole is
of coarse steel. The wood infill, wedge and bun is Kingswood. The plane weighs
1.5 lbs. It certainly has "authority" when planing nasty grain!
I've been wanting a plane like this since day one. I really
like the lines of it. I'm planning another (or two) that will be without a wedge
(to look more like the originals).
If you have any questions and would like to contact me, my
address is:
BucknerB@mail.co.leon.fl.us